R Package Tutorial II Dipping your toe into the water
Author: Matthew Wolak
Preamble
Now that you have gotten set up in Part I, we will get started here by creating the basic structure for the package, fill it with functions and help documentation, and check to make sure you have created a functioning package. This will hopefully be a safe way to test the waters and make you decide that you want to fully jump in to R package making!
The point here is to get something up and running with as little pain as possible. R packages are like fine wine: lots of small sips give you a really great buzz! So Part II of the tutorial should get your basic package created fast and enable you to later add new functions as you think/write them, improve documentation to be more helpful or descriptive, etc.
Make the structure
Create a space
In R, start by (1) loading devtools for many operations in this part, (2) pointing R to where you want to hold the package on your computer, and (3) creating the minimum necessary folder structure. I will be calling mine the wolakR package to host various R functions that I personally use over and over again.
# (1)
library(devtools)
# (2) FIXME: Edit for your own directory
setwd("wolakR_parent")
# (3)
create("wolakR")
# NOTE: above default is to create an RStudio project file
## use `create(..., rstudio = FALSE)` to avoid this
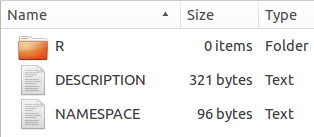
Your directory should look like something like this
Note, if you executed create("wolakR") as above (as opposed to create("wolakR, rstudio = FALSE)), this has automatically added and populated the hidden files .gitignore and .Rbuildignore inside of the package. These will become useful later on as we begin to build the package from source and host it on GitHub. For now, just ignore them. If you don’t have these files, don’t worry as they won’t be needed until later (when we will create them if need be).
That is the basic structure and now we just need to start changing a few default entires and begin filling in your package!
Metadata in DESCRIPTION
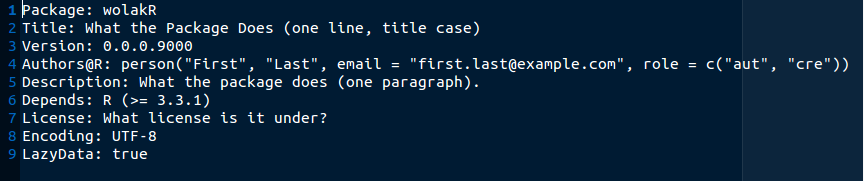
I know you are antsy to write your functions, but first open the DESCRIPTION file in a text editor and quickly fill it in. Then, come back later and revise, revise, revise as your package develops.
Below is what this file should look similar to when you first open it. I’ll give a quick few words about each section that you need to edit and won’t discuss the sections that you can leave with the default values for now.
Title
Write something short and sweet that might entice someone browsing through thousands of package titles. The accepted style is to use title case and do not end this phrase in a period.
For example:
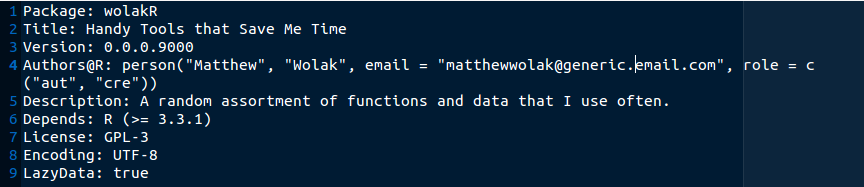
Title: Handy Tools that Save Me Time
Version
I generally use the X.X.X.X format, however, other people use something like X.X.X-X, where the Xs should just be integers separated by . or -, no characters at all!
Versions reflect the fact that code starts off, well a little off. Packages, like single lines of code, aren’t perfect at the first pass and so inherent to package writing and development is the iterative process of improvement. Use the version number of the package to reflect this process and provide a simple means of conveying the degree to which minor/major changes have occurred between states of the package. For example:
0.0.0.9000starting point for the package0.0.0.9001a new development feature/code that is under construction0.0.1.0a new version of a fairly stable (but not releasable) package0.0.2.0minor fixes to previous version0.1.0.0major changes/new features have been added1.0.0.0banner day for the package (first release, fundamental changes to structure/methods, package extended substantially, etc.)
For now, I’ll just leave this as is:
Version: 0.0.0.9000
Authors
This section should be self-explanatory, but fill in your contact information. It is particularly important to have this field correct and valid when submitting your package to CRAN.
note I’ve left the last argument to this function (that’s right, you can include R functions in fields of the DESCRIPTION file) with the default to signify that I am both the author and creator.
... , role = c("aut", "cre"))
Description
Use a few sentences to explain what your package does at a broad level. Remember that really interested readers can browse your functions to better sense what specifics can be done.
At the moment, I’ve kept this short and sweet. More can be added as the package develops.
Description: A random assortment of functions and data that I use often.
License
Fear not, you don’t have to write a license (although, you can). If you aren’t releasing this package, then this field is not completely necessary. However, if you do decide to release and share your package, this is an important decision as it enables you to take credit for your code, protects you from anyone else unfairly taking this credit, and clarifies how/what can be done with your code and package.
There are various open source licences that you can use and searching the web will easily find you several websites that carefully explain how to choose a particular open source license (e.g., https://choosealicense.com/).
For now, I’m going with a fairly standard Open Source option (see previous link) and will include the abbreviation for my chosen license (also a file including the full license can be put here).
License: GPL-3
Onwards
We will leave the rest for now, and so here is what the file looks like after the above fields have been edited.
Remember to come back and update this as the package evolves!
Make some functions
To get the hang of this package making process, start simple with one or two basic functions (e.g., don’t have complex methods, input arguments, or outputs). Below I will demonstrate functions that I find handy, but you should try and substitute these for something useful to you.
Add/write functions
Try to think of some R code that you constantly find yourself copy-pasting across different projects or R scripts. Turn this code into your own whizbang function and follow along! Afterwards, we’ll discuss how to tidy everything up, but for now just get a basic working function with which to practice so you can focus on package development.
Sexual Dimorphism Index
Say we want to quantify the average amount by which females and males differ (sexual dimorphism) in some measured trait by calculating a sexual dimorphism index (SDI). Lovich & Gibbons 1992 proposed calculating the ratio of the larger sex to the smaller sex, subtracting one, and then arbitrarily assigning a positive value when females are the larger sex or a negative value when males are the larger sex. This is considered the best SDI because it is linear, intuitive, symmetrical, and directional.
Suppose I had a data.frame with the mean female and male measurement for four traits in a population.
popDat <- data.frame(trait = c("length", "weight", "coloration", "intelligence"),
	female = c(4.2, 255.0, 0.57, 144),
	male = c(3.7, 255.0, 0.89, 143))
An initial attempt to calculate the SDI for each trait would be to stick some code into a for loop, where we iterate through traits.
sdi <- rep(NA, nrow(popDat))
for(t in unique(popDat$trait)){
  tmpind <- which(popDat$trait == t)
  fm <- unlist(popDat[tmpind, c("female", "male")])
  if(any(is.na(fm))){
    next
  }
  if(fm[1] == fm[2]){
    sdi[tmpind] <- 0
  }
  larger <- which.max(fm)
  smaller <- which.min(fm)
  index <- (fm[larger] / fm[smaller]) - 1
 if(larger == 1) sdi[tmpind] <- index else sdi[tmpind] <- (-1 * index)
}

sdi
Unfortunately, the for loop approach requires re-writing this code in each R script we ever use to analyze data of this type. This approach also requires (me) to look up specifically how to calculate the SDI each time (okay, so I would probably cut+paste previous code, but this is still inefficient). Instead, it is really simple to put the main body of the code from the for loop into a function and then use sapply()
It is actually pretty easy to take much of the for loop and stick it in a function.
SDI <- function(t, dfin){
  tmpind <- which(dfin$trait == t)
  fm <- unlist(dfin[tmpind, c("female", "male")])
  if(any(is.na(fm))){
    return(NA)
  }
  if(fm[1] == fm[2]){
    return(0)
  }
  larger <- which.max(fm)
  smaller <- which.min(fm)
  index <- (fm[larger] / fm[smaller]) - 1
 if(larger == 1) return(index) else return(-1 * index)
}

sapply(popDat$trait, FUN = SDI, dfin = popDat)
1 utils.R or n files for n functions?
The next thing to do is to save the function in a text file ending in .R inside the R directory of your new package. As the section heading states, you can save functions in unique files by themselves or put more than one function together in the same file. The two extremes are probably not ideal, so choose something in between and provide informative file names.
I’ve created a file summary_stats.R in which to put functions that create non-standard summary statistics.
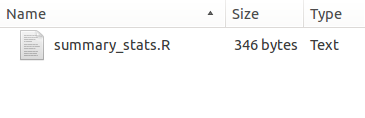
Right now, SDI is the only function in this file,
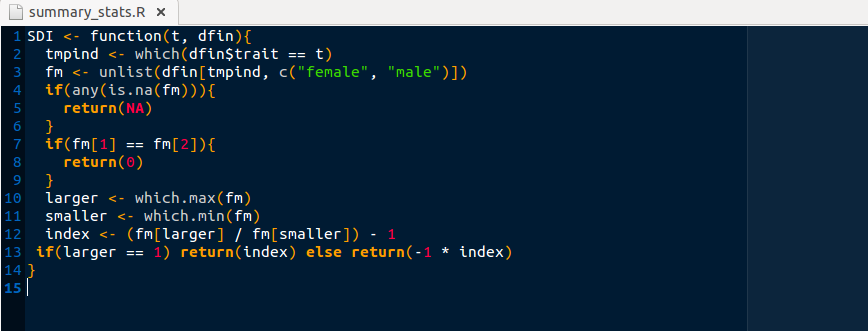
but more can be added as they are created.
Document the code
In another part of this tutorial we will cover documenting code and writing help manual pages using the R package roxygen2. But here, we will do it ‘by hand’ so you gain some experience with the different sections of the .Rd files that are rendered into the help pages (as well as develop an appreciation for what roxygen2 will do for you).
We will use the prompt() function to generate a default SDI.Rd file for the SDI() function. This is then placed in the “man” directory folder of your package, which contains all of the files that are turned into the help pages when an R package is installed.
Make and edit .Rd files
Here, we use the prompt() function to fill-in a lot of information already for a specific function that we wish to document.
prompt(SDI)
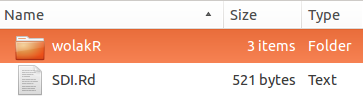
Note, this saves SDI.Rd to the parent directory (e.g., wherever getwd() returns), which is wolakR_parent in this case:
prompt() already auto-fills a lot about the basic structure of the function for us. See the top of the file, for example:
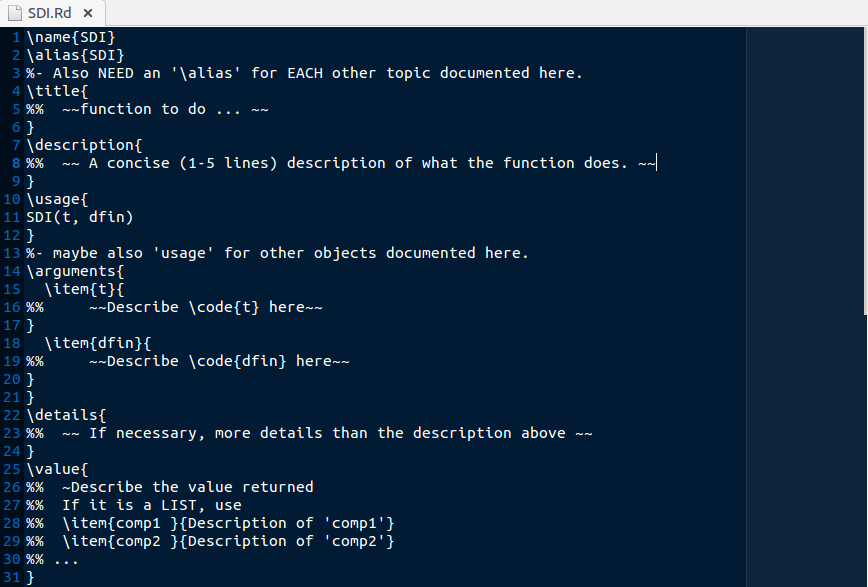
Note the prompt() function notifies us when we need to change/add/edit and provides guidance using symbols like:
%% ~~function to do ... ~~
Now, we will edit the file to fill in the specifics.
Title and Description
These should follow the general format used for the same fields in the DESCRIPTION file.
\alias{SDI}
\title{
Sexual Dimorphism Index
}
\description{
Calculates the sexual dimorphism index of Lovich & Gibbons (1992): \code{(larger sex / smaller sex) - 1} and arbitrarily made positive when females are the larger sex or negative when males are the larger sex.
}
Note the citation, which we will discuss in just a second. Also, we deleted the note about aliases, as there are none at this time.
Usage and Arguments
The usage is correct as is, and since this is a simple function, we have no further methods to discuss (so delete this comment).
The formatting for the Arguments label is such that it will produce a list when rendered (think about all of the R help pages you have looked through). Each item is named within the curly brackets of \item{} and then the description follows in curly braces {}. Keep these somewhat brief, any elaboration can be put in the Details section.
Helpful documentation indicates specifically what type of R object is expected (e.g., numeric, integer, character, data.frame, list, etc.) and then what type of (non-R) information should be contained in such an object.
\usage{
SDI(t, dfin)
}
\arguments{
  \item{t }{
Character object naming a trait in \code{dfin}.
  }
  \item{dfin }{
Data frame which must contain at least three columns: one containing trait names that match \code{t}, a column with female measurements that must match "female" exactly, and a column with male measurements that must match "male" exactly.
  }
}
Take care with all of those curly brackets. Indentation (as shown above) can help to keep you from having an unequal number of left and right brackets.
Details
Here, you can elaborate on anything in the description, the arguments, or something special about the particular code that is the guts of your function (e.g., is there a special or published algorithm that is being implemented?).
Any further hints as to how a user might deal with potential error messages is useful. However, this should be fairly brief and only include the details that would interest someone really interested in how your function works (either because they are having trouble using it or because they are genuinely interested in the underlying math/code/algorithm).
Value
Here you tell folks what the function returns. Like the arguments, it is good to be specific about the R object returned and then what it means.
\value{
A numeric representing the calculated sexual dimorphism index for trait \code{t}.
}
References and Author
The references is where you can give full citation information for any names you have dropped. Use your own style (try and be consistent) or you can get fancy and insert BibTeX formatted references.
The author field is very important and necessary. Who is this code attributed to, but also who should be contacted when it gives the wrong answer!
\references{
Lovich, JE & Gibbons, JW. 1992. A review of techniques for quantifying sexual size dimorphism. Growth, Development, and Ageing 56(4):269-281.
}
\author{\email{matthewwolak@generic.email.com}}
Note and Seealso
These sections aren’t necessary and can be deleted. See the official Writing R Extensions documentation for more information on these parts.
Examples
This section is also very important, not only to help users but also to include simple tests that will let you know if your code is broken whenever you check your package (because all examples are typically run when package checks are done, see below).
Make these simple (both in what they do, but also in the computing requirements necessary to run these) so they are informative, helpful, and run quickly on computers that aren’t as fast as yours! Note, it is possible to include examples that aren’t run, but see Writing R Extensions for more information about this.
Here, I’ve just included the example I walked through above plus a simple check.
\examples{
popDat <- data.frame(trait = c("length", "weight", "coloration", "intelligence"),
	female = c(4.2, 255.0, 0.57, 144),
	male = c(3.7, 255.0, 0.89, 143))
SDI("length", popDat)
sapply(popDat$trait, FUN = SDI, dfin = popDat)
stopifnot(SDI("weight", popDat) == 0.0)
}
stopifnot will return an Error if the condition is not met. In a package check, this Error will be reported and so it will nicely point to where we need to look in order to fix some code that isn’t working correctly.
Move it to the ‘man’
Now we need to move the help file to the appropriate location in the package source. This is in the man folder, which was not created automatically. So create the folder
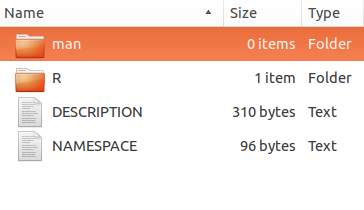
then move the SDI.Rd file you just edited into this folder.
Pop some fizz!
Congratulations, you basically have an R package!! There are technically more steps before the R nerds stop cringing about the shape of your package (more in Part III) - but forget about them for a little while and celebrate.
Install your package
Make sure you are in the directory containing all of your package files, then use the devtools function install() to turn those files sitting on your computer into an R package that is installed in your R program!
setwd("wolakR_parent")
install("wolakR")
library(wolakR)
Type ?SDI (or whatever you called your R function) and see the help page (with your name in the author field)!
Checks
We will use the devtools package to run a bunch of checks on our package structure and syntax. The check() function in this package will run through a list of operations and print some basic output to the screen. If you want this package to be acceptable for hosting on CRAN, it should return ‘OK’ at every stage (and no ‘NOTEs’ or ‘WARNINGs’). Though, that is not the only criteria for your package to be acceptable to CRAN!
NOTE: the utils package that comes with base R also has a checking function by the same name as the devtools function. Hence, we will point R to the devtools namespace to search for the check() function using the :: operator.
Further, I specify check(... , document = FALSE) below so as to not have devtools automatically creat the documentation based on roxygen2 comments (see next tutorial). We will relax this later, but in order to avoid your hard written documentation from being over-written make sure document = FALSE!
devtools::check(pkg = "wolakR", document = FALSE)
No Windows, no problems
Further, if you don’t have access to Windows and you want to check your package out on a Windows machine (it is amazing what will not work across operating systems), there is a great and FREE resource at win-builder. There, you can upload a compressed archive file of your package and have a link to results e-mailed to you in a very short while (often just enough time to make some tea/coffee!).
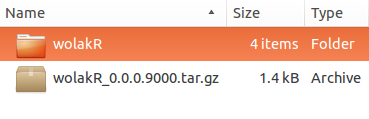
Again, devtools to the rescue! Use the build() function to create a compressed bundle to upload on win-builder.
devtools::build(pkg = "wolakR")
Hosting
Why should you put your package out there for all to see and use? The basic reason to host your package on some code sharing website could be just to share it with yourself - you can always have access to your handy R functions regardless of whether you are on your own computer or someone else’s. But beyond that, hosting your R package quickly makes it easy to share neat functions you’ve made with others (friends, collaborators, etc.). Also, R packages can contain data so now you have data with important functions all bundled together.
Beyond the basic hosting (where folks can point their web browser to your package and read your code online), devtools makes it really easy for folks to install an R package from a variety of repositories (e.g., GitHub, Bitbucket, etc.) without ever leaving R! And that is what this section will get you to do.
git it
To be able to install your R package directly into R from the code hosted on GitHub, we will make a git repository for the package. More about git and GitHub can be found in a previous tutorial, so this won’t be covered here. I’ll just mention the basics and a few R package specifics that need to be taken care of in addition to the normal git and GitHub type procedures.
Don’t ignore this
As promised earlier in the tutorial, we need to make sure two additional files are in our package, .Rbuildignore and .gitignore. These are hidden files, so you might need to do a little snooping to figure out how to show all of these when you are browsing your folders (e.g., on Linux, I press Ctrl+H to see the hidden files in nautilus).
Way up at the beginning, when we used create(), the default was to make the package an RStudio project. This default automatically created these two files, but if you don’t have them create two blank files with their names (don’t forget the . at the beginning!!) and put into them:
- .gitignore
.Rproj.user
.Rhistory
.RData
- .Rbuildignore
^.*\.Rproj$
^\.Rproj\.user$
Install from GitHub
For now, that should be all you need to do (in addition to making the repository README.md). Keep the .gitignore and .Rbuildignore files in mind in case you add any new files that need to be ignored. So now, assuming you have your R package hosted as a repository on GitHub, installing this directly into R couldn’t be easier.
library(devtools)
#               < username > / < repo name >
install_github("matthewwolak/wolakR")
library(wolakR)
And there you have it! Go forth, develop packages, and share with others! Keep adding functions and documentation or go to Part III of the tutorial to learn to use roxygen2 and how to get this package in shape to be hosted on CRAN!